Experiments with black & white transparencies
Many years ago, in a book on photography which I had when I was a teenager, I read about the process of developing black & white film as transparencies instead of as negatives. I was fascinated to read that it’s only the process which changes – the film used is the same. This contrasted with colour slides and colour prints which were bought as a different type of film as well as being developed using a different process.
Fast forward to a few months ago and I was equally fascinated to read an article on a web site which explained how it’s possible to produce black & white transparencies by introducing an additional bath after the developer, and the bath could be made with readily available chemicals. Now, admittedly there isn’t the same need to produce black `& white slides as there was all those years ago – I no longer project slides, but the thought of being able to produce slides was so interesting I thought I’d like give it a try.


Unfortunately, the article I read which described the process didn’t give any hard and fast rules about the times and temperatures for the whole process, only how the new bleach bath is made and used, so I knew some of the process was going to be a series of guesses.
The whole process is as follows
- Develop the film using any normal developer
- Carry out the bleach process
- Expose the film to light
- Carry out a second develop
- Fix the film
The new bleach bath is made using Hydrogen Peroxide 3% solution, and white vinegar. The mix is 250ml Hydrogen Peroxide to 10 ml of white vinegar, but since I needed about 300 ml to fill my tank I slightly altered the quantity to get the same proportion but 300 ml. I bought the Hydrogen Peroxide solution from Amazon UK and it cost only a couple of pounds for 400ml.
Because I wasn’t sure how or even if the process would work, I didn’t want to risk trying it on a film which I needed the results from, so I loaded a few frames of FP4 from a bulk loader and went round the house to take some test shots. I used a Pentax Z-1p to take the pictures because I was sure I would get well exposed pictures using that camera.
Developing the black & white transparencies
With the film exposed and loaded into the tank, I used a 1:25 solution of Rodinal to carry out the first development which was for 8 minutes at 20°C with tank inversion every minute for agitation.
With the development completed, I poured the developer into a jug so I could use it for the second development and proceeded to carry out the new bleach bath. The instructions I found indicated the bleach should be carried out at 150°F or about 66°C which sounded very hot to me, and I was concerned that the film would be damaged so I just heated it with water from the hot tap (which was about 100°F or 37°C) and bleached for 8min instead of the specified 6min.
After the bleach was complete comes the weirdest part of the process – you open the tank, take the film out and expose it to light. Now I knew this was part of the process because I remember reading it in the original book all those years ago, but it’s a very strange thing to do since the whole process of film development is normally done in the total darkness of the development tank. Anyway, I removed the top of the tank and took the reel out, and then carefully removed the wet film from the spiral to expose it to light.
I was both amazed and thrilled to see images on the film as I took it out of the spiral – I hadn’t been expecting that. I don’t really know what I had been expecting but it was really exciting to see the pictures. Unfortunately, I didn’t have my phone with me and so I didn’t take any pictures of the film in that state, but when I try again I will make sure I do.
I didn’t know how long I was supposed to expose the film, but I remember reading before that this stage can’t be overdone, so I held the film up to the sunlight for about 2 minutes, turning it to try to get every part exposed.
I then replaced the film on the spiral (not easy when it’s wet) and replaced the spiral in the tank. I believe all the other steps can be carried out in the light, but I actually refitted the lid so I could invert the tank. I had to then carry out the second development stage, which I did with my rodinal mix, but I didn’t know how long I should give, so I made a guess and tried 12minutes. This was based on the fact that the developer would be partially drained from the first development but it really was pure guess work.
After the 12 minutes of development and agitation I used Illford rapid fixer to fix the film and then washed the film and removed it from the spiral again.
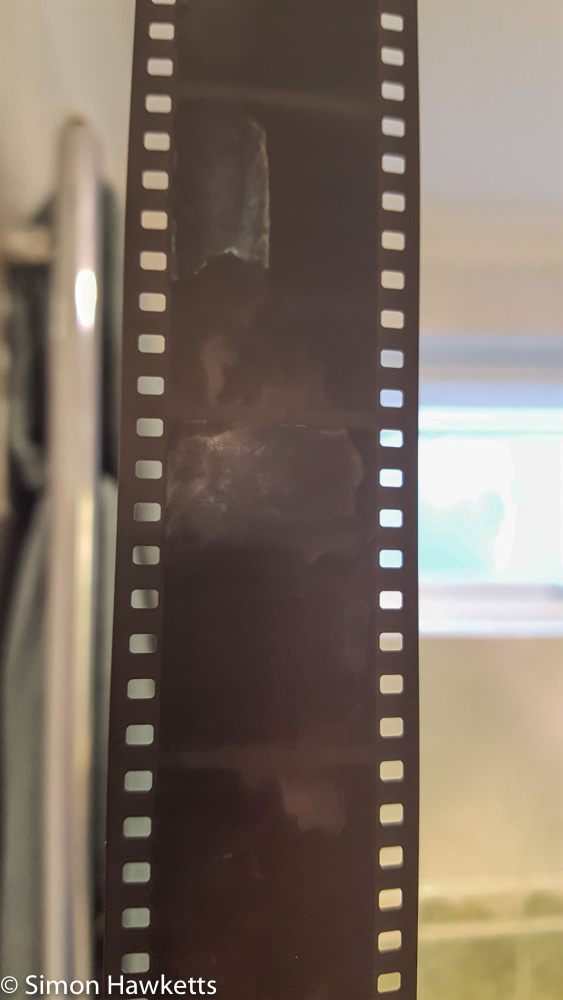
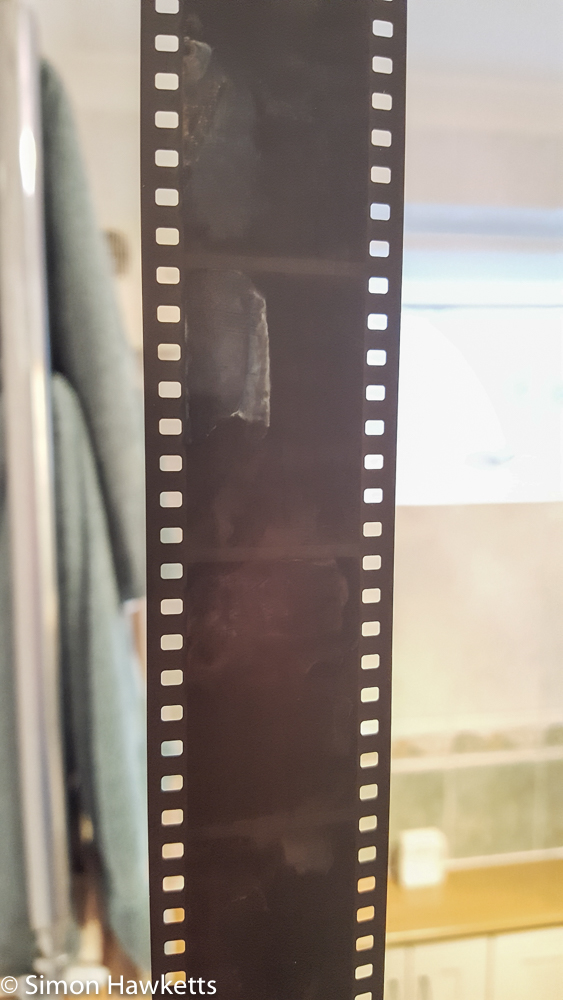
Unfortunately, the results are not good. The brilliant pictures I saw after the first developer and bleach stage had completely gone and the film is mostly black. I can just make out a few features but basically I don’t think I would get a scan from the film – it’s just too dense.
So what went wrong? Well I’m not sure but the theory I have is either the bleach really should have been at 150°F or possibly I’ve just got the second developer time completely wrong. I’m going to try developing black & white transparencies again and next time I’ll try experimenting with times and temperatures. I might also try to carry out the second development with the tank lid off, and actually see if I can get the development right by looking at the film as it develops. When I try again if I get better results I’ll post again.


Popular photography mag was mag of choice in which I read of some bw slides. About 45 yrs ago. (COLLEGE DAYS)
Fascinating. I think I shall try it. There is a pdf on the Ilford web site… http://www.ilfordphoto.com/Webfiles/20114271220441194.pdf
What article did you read?
The original article I saw was http://blia-yof.blogspot.co.uk/2015/05/roll-reversal-safe-alternative.html
Here is a link to instructions for processing Kodak T-max films as B&W slides using a formula developed by Hans F. Dietreich. This is also available as a kit from BH Photo.
http://www.digitaltruth.com/products/formulary_tech/01-0600.pdf
http://www.bhphotovideo.com/c/product/123359-REG/Photographers_Formulary_01_0600_Reversal_Process_Developer_T_Max.html
I hope this helps. Would love to see your results.
-David
Well, that article is from 2015, my article, from 2013, states another dilution, nowadays I improved the formula, anyway I find very hard to fully bleach a reversal film in such a low concentration of peroxide, since 2012, the year I started to test hydrogen peroxide as a reversal biodegradable bleach the minimum concentration I could obtain results with was 5%, but the ideal concentration is 9% I don’t know where Kelly Fuller got his information from, but here’s my first article about this: http://www.filmlabs.org/docs/citric-hydrogen-peroxide-bleach.pdf
Again, acetic acid works as a much more effective hydrogen peroxide stabilizer,
All best
Thanks very much for that link Ricardo – I’ll try again with a stronger bleach solution.