A couple of weeks ago, I managed to pick up a camera which I'd been on the lookout for quite a while, an Agfa Ambi Silette 35 mm rangefinder. The camera was sold as 'not guaranteed working' and that turned out to be quite accurate because it certainly wasn't working when I tried it! I'll go into more details in the article but, as a heads-up, this post covers the Ambi Silette film advance strip down.

Introduction
The first problem was that the shutter blades were stubbornly locked closed and wouldn't open at any selected speed, and the other issue was that the film advance and shutter release button were very stiff and sticky. The frame advance had to be helped back after cocking the shutter, and the release button had to be pulled up after pressing it. After a few dozen uses, the frame advance problem was only slightly better, so I decided the top needed to come off, and I'd have to give the film advance mechanism a bit of attention.
I did a Google search and found almost no information on this, so I decided I'd have to try to do this myself and make sure I took lots of pictures, so I could get the camera back together. Since this may be of use to others, I've written this post and included the pictures to help guide anyone who finds it useful (and act as an aide memoir for myself if I ever need to do it again).
So here are the pictures and description of what I did.
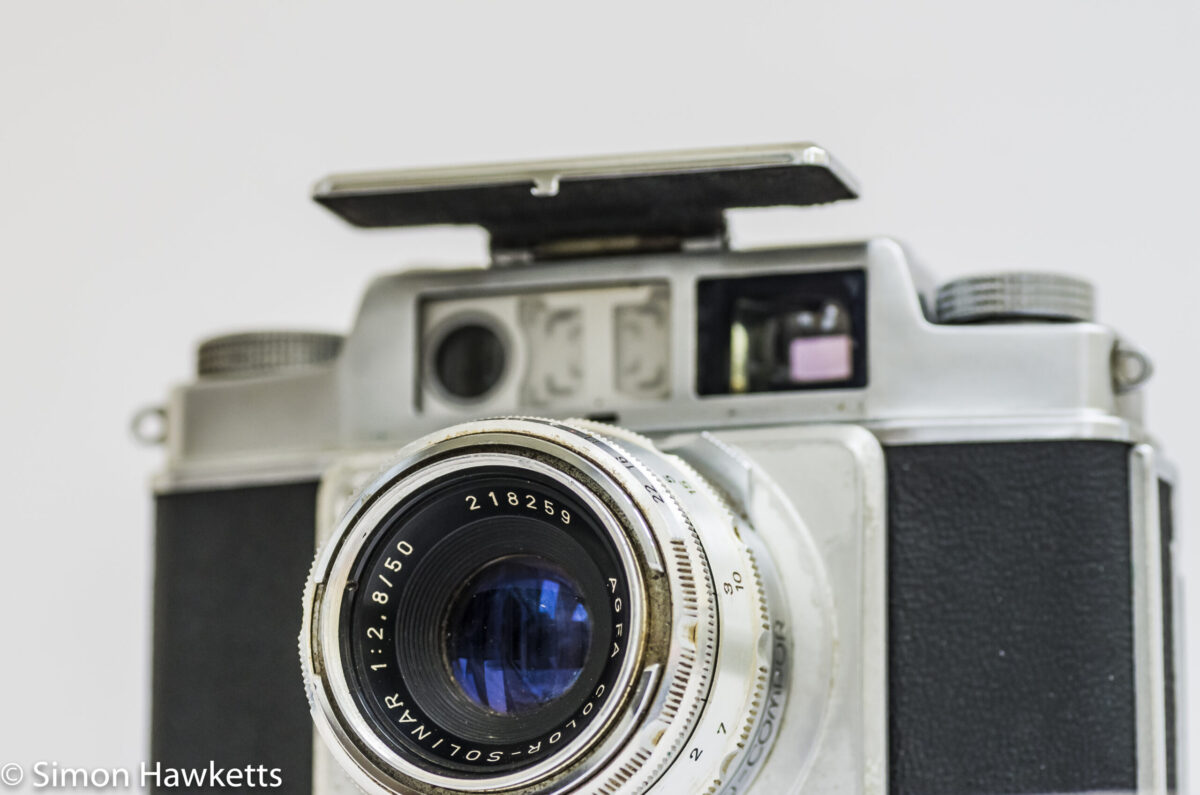
Ambi Silette Top Cover Removal
The first thing was to get the top off the camera. This proved to be significantly easier than removing the top of my Agfa Silette L, which I haven't been able to work out yet!
The process is shown below in pictures. Although there seem to be a lot of pictures for a simple procedure, I wanted to make sure I wasn't left in a situation where I didn't know how something went together when I came to put it all back. It's surprising how often you think, "I'll easily remember how that fits", only to find it's a complete mystery when you come to it!


To remove the top, I had to remove the rewind crank by holding the shaft in the camera body with a screwdriver in the open 'prongs' and unscrew the top. Then I could remove the lock nut under the rewind crank. A word of warning, the rewind crank has a film speed reminder fitted in it, so to stop all this falling out put your thumb under the bottom and when it comes free place it upside down on the work top.
The top is then held on at the film advance end with a screw under the film advance lever, so you need to remove the middle of the frame advance and pull the frame counter and advance up and off. Undo the screw which is revealed and the shaped washer and then wriggle the top to remove it. The two strap lugs don't help here, but the one on the rewind crank side is loose at this point, so it can be moved, and the camera top pushed over to the frame advance side. With a bit of wriggling, it comes off.
As I took the components off, I took the opportunity to clean them with a cotton bud and some IPA.
Film advance clean up and lubricate
Ambi Silette film advance Strip down
With the top cover off, I could see the mechanism which both winds the film and cocks the shutter, as well as see the general layout of the camera.


The rangefinder assembly is a self-contained unit which sits in the middle of the camera and can be removed by undoing 3 screws which hold it in place. As you lift it away, there is a mechanism underneath it which pushes on a lever at the bottom. This is the way the position of the lens focus ring is transmitted to the rangefinder mechanism.
With the rangefinder removed, I could get a better view of the frame advance system. The first thing I noticed was the amount of dirt within the mechanism, and also that there was some rust as well. I suspect that there must have been some water leakage at some point in the past.
At this point, I removed the back of the camera by pushing the top of the pin in the hinge down with a very small screwdriver and pulling it out of the bottom. This wasn't completely necessary, I just found it was getting in the way.
The first component I looked at removing was the return spring, since it was at the top of the problem area. After I'd taken a few pictures to be sure of the orientation, I pushed the spring end out of the pillar which holds it in place, unwound the spring and pulled the pillar upwards and off the frame advance drive shaft. I also removed the circular disk which sits on the retaining pillar (presumably it is just to stop the spring being able to come over the top of the pillar).
With the return spring off, I could see there was quite a bit of rust on the plate which holds the frame advance drive shaft in place. It is held in place with three screws, two of which also hold the strap lug. With the strap lug screws removed, I unhooked the small spring which keeps the component which locks the shutter release in place, and then removed the final screw. With that plate removed, I could see the frame advance drive shaft.
The drive shaft operates the film advance by way of a latch and cocks the shutter by way of a long component which runs along the back of the camera. This component has teeth which mate against a cog in the body of the camera which turns the shutter cocking shaft. I could bend the shutter cocking component (because it has a joint in) out of the way and lift the drive shaft up. Once out of the camera, I could see the large amount of dirt on the bottom of it, and I could also see how the long component which cocks the shutter was pretty much seized together at it's mid-point joint.
Ambi silette film advance Clean and rebuild
With all the components out, I set about cleaning them up and greasing them.
I first used cotton buds with IPA to get as much dirt off as I could and then on the rusty parts I used some cleaning pens which I bought a while ago. These are like propelling pencils, but the tip is fibre in one, brass wire wool in another and steel wire wool in the most abrasive. Using the steel wool pen, I could get most of the rust off, but not all.
I then used a tiny amount of multipurpose grease to lubricate the surface of the drive shaft, the latch on the drive shaft and all the other places where one component rubs against another. When I say tiny amount, that is what I mean; I only used a quantity about the size of a match head to lubricate every part.
Once everything was back together, I was pleased to find that the film advance runs really smoothly, with a feel like precision clockwork - next job is to remove and try to fix the shutter.


This post is part of a series: Agfa Ambi Silette