Adding colour to a black and white photo in Photoshop
As I said in a post a few weeks ago I’ve been scanning and repairing some pictures which my Father took over the last 50 odd years, as well as some taken by other members of the family going back even further. I’ve had to learn quite a few techniques in Photoshop like when to use the the spot repair tool and the clone stamp tool and I’ve managed to successfully repair some quite bad tears and damage.
One thing which I thought would be nice would be to try to add colour to some of the pictures so I investigated and tried a couple of methods for doing this.
The first, which was fairly unsuccessful, was to try to use the selection tools to select individual portions of the picture and then create a colour adjustment layer to apply a colour ‘wash’ to each of the selected areas. As I say, this was unsuccessful, mostly because the pictures are quite low definition by today’s standards which made the selections too imprecise to work. Since a lot of these images were contact prints made from 2 1/2 inch negatives taken on box cameras I suppose it’s not surprising that a lot of them are quite fuzzy!
Because this didn’t work I tried another approach, which was to create a layer, set it to blend mode colour and use the brush tool to simply paint over various features in the picture. I used a different layer for each feature I painted so that I could concentrate on the individual area, and also limit the amount of work I would ruin if I made an egregious error which I don’t have the experience to remove. Each of these layers were added to a layer group which made turning them on and off much easier.
I found this technique to be easier to do, and learnt a few Photoshop shortcuts which certainly helped, for example altering the brush size by holding Command/Option and dragging the brush left to right to set the size and up and down to set the fuzziness. Another really useful technique I found was to use the R key to choose the rotate mode and turn the picture so that the brush strokes are all being made in approximately the same direction. I was reminded of something my wife told me (who does a lot of paper craft) – she says if you are cutting paper you always turn the paper not the scissors.
Another useful tip which I learnt was to use a strong colour initially when colouring the features and reset it to something realistic after the area has been completed. The reason is that it is better to use quite muted shades on old pictures; it doesn’t look right to have very bright, high contrast shades when the people in the picture are obviously from an earlier timeframe, but it is better to use a strong colour to make sure that all the feature is coloured. So I coloured things using a very vivid colour and then used Option U to bring up the adjust colour dialog and change it afterwards.
So overall I think this is the better of the two options I’ve discovered so far with the type of pictures I’m dealing with, but my limited experience of Photoshop has taught me that there are normally more than one way to do most things so I’m going to keep experimenting to find the best technique for each picture type I want to colour.
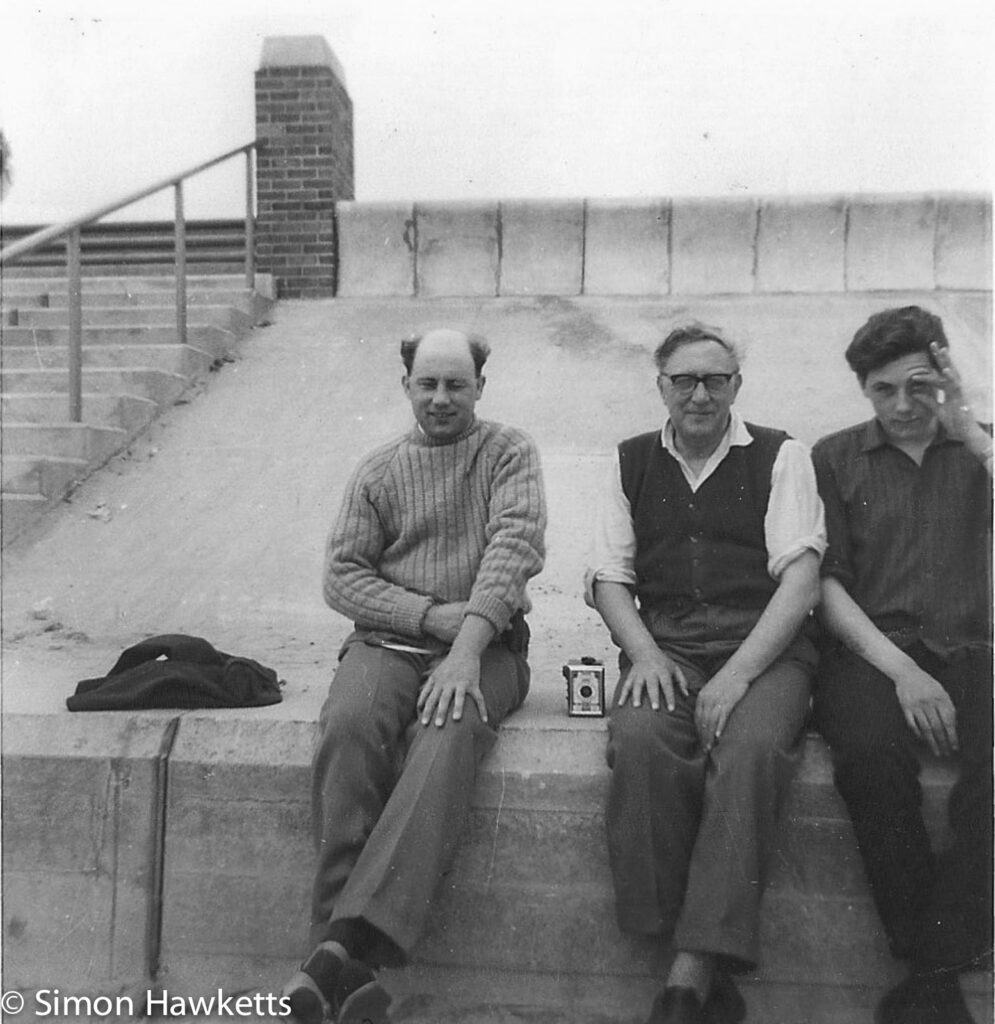
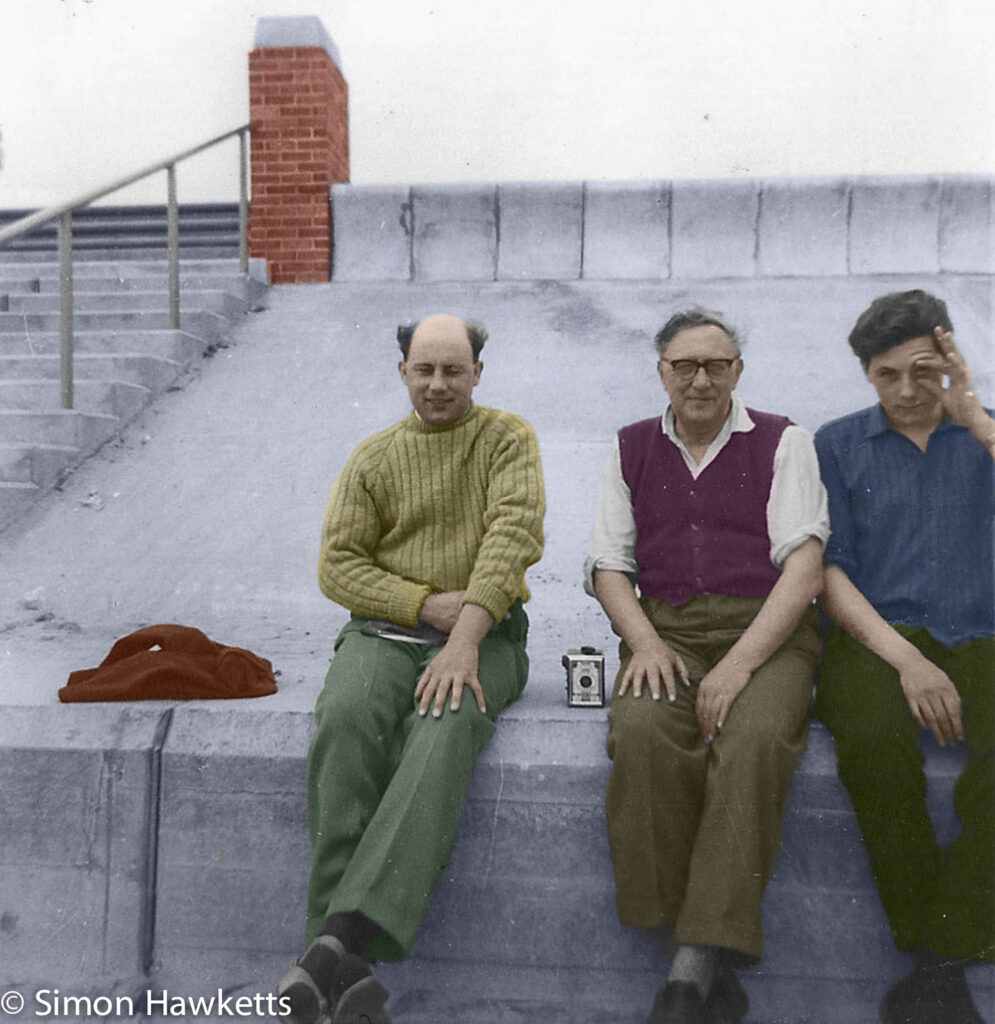
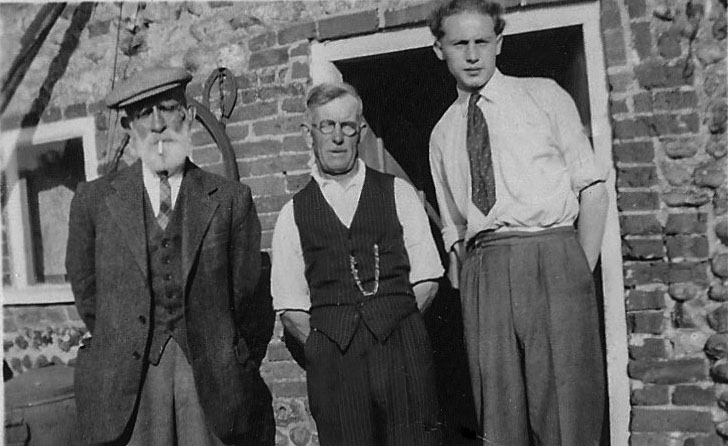
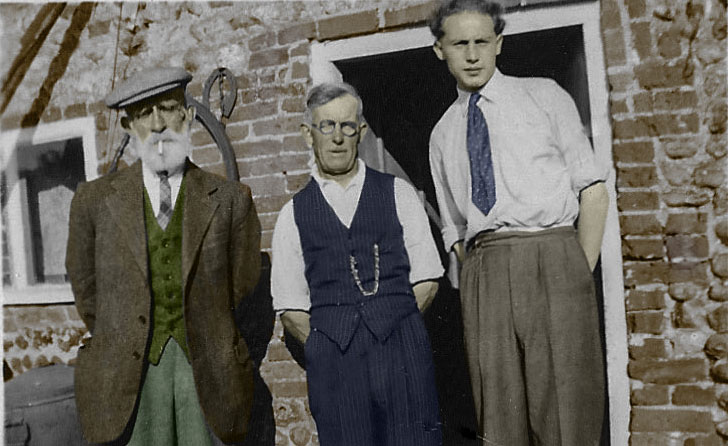
The results of some of the first pictures I’ve coloured in this way are below – there are areas where the colours bleed a little into another area, but overall I’m happy with the result. These pictures took about an hour each to colour which is not too long, and I certainly think it adds a lot of interest.
